There comes a day in the lives of many homeowners when they become tired of dragging hoses and sprinklers around or lugging buckets or watering cans to water the plants in their yard. If you’ve reached this point and are curious about irrigation options, you’re in luck! Drip irrigation systems and soaker hoses are two popular methods amongst the many choices.
When homeowners search for irrigation methods, they often ask which system is better when comparing drip irrigation versus soaker hose.
Truthfully, this is a tricky question to answer.
Which of the two methods is best depends entirely on your situation. While drip irrigation and soaker hoses are often thought of as the same, they have distinct differences. Because of this, which is best depends on how you want water delivered to your plants, how much control you want over the amount, and how much money and time you want to invest in a system.
So, let’s discuss each type of system, the benefits of each, and compare the two so you can decide which irrigation method is best for you.
What is Drip Irrigation?
Drip irrigation is classified as a micro-irrigation system. It delivers water to plants drop by drop through a system of pipes, PVC tubing, and drip emitters. Systems can range in intricacy from basic setups that connect directly to your hose bib, turning on when you manually turn the water on, to fully automated systems that come on when scheduled and take into account rainfall events.
Benefits of Using Drip Irrigation
One of the best advantages of a drip irrigation system is the amount of time you save watering your plants. But there are also many other excellent benefits to installing a drip system in your yard or garden.
- Improved water conservation – Roughly 30% of home water use is applied outside to gardens, flowerbeds, and lawns, with a fair amount lost to runoff or evaporation. Applying water through a drip irrigation system reduces this water loss by 20 to 50%, depending upon the setup.
- Ability to fine-tune water use-efficiency – While all plants need water to survive, the amount they need varies significantly from species to species. A drip irrigation system allows you to provide the exact amount of water to a specific plant instead of watering on a blanket schedule for the entire garden.
- Less nutrient leaching – With a much lower amount of water moving through the soil, fewer nutrients are needlessly flushed down through the profile and out of the root zone. Less leaching equates to a reduced need for fertilizer applications and less ground or surface water contamination risk.
- Minimization of soil erosion – When you apply large quantities of water to sandy soils or sloped areas like hillsides, soil erosion rates are high. Applying a smaller amount of water to a specific place over a slow period drastically reduces soil erosion and loss.
- Reduced weed competition – With water only delivered to the plants, there is less seed germination and seedling emergence between plants. This decreases competition between your plants and weeds for needed resources such as water, nutrients, and sunlight, while also reducing the time and energy you expend pulling or killing weeds.
- Fewer pests and disease problems – Delivering water directly to the soil above the roots and only applying the needed amount to each plant significantly decreases pest infestations and disease occurrence. Plants aren’t overwatered, and water isn’t applied to the foliage.
Components of a drip irrigation system
As mentioned earlier, drip systems can range from very simple setups to complex configurations. Regardless of the intricacy, three main parts are necessary for a drip irrigation system: a water source, lines or tubing, and emitters.
Component 1 — How You Tap Into Your Water Source
Whether you are on a well or have municipal water, the water supply feeding your home will also supply your drip irrigation system. But there are different ways to access the water source.
- The simplest way to get water is to attach drip irrigation directly to the hose manifold in your yard. It is the same as threading a regular garden hose to the spigot.
- More complex systems tap directly into the main water line before it feeds into your house. A system like this is more permanent and often requires professional help from a landscape contractor.
When tapping into your water supply, you also need to install a backflow preventer and a pressure regulator. The backflow preventer keeps your drinking water from contamination, and a pressure regulator valve reduces pressure, so you don’t blow out emitters.
Component 2 — How You Move Water to the Plants
The second component of a drip system is the lines carrying water from the spigot or main supply manifold to the plants.
- Simple systems use a ½”, ⅝”, or ¾” semi-flexible polyethylene tubing that can be configured to your needs. This mainline tubing is easy to cut with tin snips or a similar cutting tool and built into a grid or pattern using elbows or t-connectors.
- More complex systems have rigid PVC pipes buried across your lawn to designated spots. At these spots, the pipe stub comes out of the ground, allowing you to attach the mainline tubing to the stub. This setup minimizes the number of lines run above ground.
Component 3 — How You Deliver Water to the Plants
Now that the water comes out of your home’s supply line and makes its way to the plants, it is delivered to plants via little parts known as emitters that release water in drips or a trickle. Emitters are typically run to the base of large, individual plants and allow you to customize the system. They are available in fixed or adjustable flow rates and measure gallons per hour (GPH).
The emitters can be attached directly to the primary tubing, or you can run ¼” vinyl micro-tubing from the mainline and attach the emitters onto the ends of the micro-tubing.
You can also purchase drip line or emitter tubing instead of individual emitters. This tubing comes in the same diameters as mainline and micro-tubing but has emitters placed inside the tubing at a predetermined spacing (typically 6”, 9”, 12”, or 18”).
Controlling Your Drip Irrigation System
Just like there are simple and complex ways to tap into your water supply, there are two different options for controlling your drip irrigation system. Which you choose depends upon your budget and how automated you’d like the system to be when it’s completed and functional.
- Walk outside and turn the system on manually whenever your plants need water. It saves money overall but does mean you have to remember to water—which is often part of the problem with watering by hand.
- Install an automated controller that dictates which day(s) the system activates, what time the system comes on, and how long the water runs. Smart controllers consider local weather (using rain sensors or smartphone apps that monitor weather forecasts) and adjust the schedule accordingly.
Common Questions About Drip Irrigation
Q. Can you connect drip irrigation to the garden hose?
Yes, you can connect it to a garden hose using a specialized coupler. Some homeowners use a garden hose to run the water to an area where the drip system is used.
Q. How do I convert sprinklers to drip lines?
Yes, you can convert in-ground sprinkler systems to drip lines. Conversion kits provide needed components to replace the sprinkler head with a manifold running water to drip emitters.
Q. Should I bury my drip line?
Whether or not you bury your drip line depends on how you are using the system. If you are running drip irrigation to permanently placed plants like trees or shrubs, burying the line keeps it from getting nicked by landscaping equipment and gets it out of the sun. However, if you’re running it to a garden that is often reconfigured, you might not want to bury it, so it’s easier to change the setup when needed.
Q. Can you fertilize through drip irrigation?
Yes, you can fertilize your plants through drip irrigation. You need to install a backflow preventer on the faucet, purchase a fertilizer injector to mix fertilizer to the correct ratio, and only use liquid, water-soluble fertilizers.
What is a Soaker Hose?
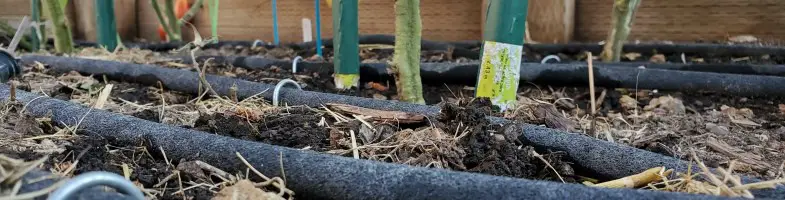
A soaker hose is another type of micro-irrigation, but it is different from a drip system. A soaker hose looks quite similar to a standard garden hose. However, its length contains many small perforations or pores that allow water to weep out or seep from the hose. Most soaker hoses are a combination of rubber and polyethylene plastic.
A soaker hose is laid on the soil surface near the plants you want to be watered. When turned on, it delivers water steadily to everything along its length.
Benefits of Irrigating with a Soaker Hose
Using a soaker hose does save an incredible amount of time and energy, allowing you to focus your time on your family or other projects. Like a drip irrigation system, it also has other benefits.
- Even water distribution – As the water slowly seeps from the soaker hose, it wets the soil slowly and evenly. All of the plants along the hose receive the same amount of water. Even watering like this is helpful when irrigating berry patches, a bed full of flowering annuals, or closely placed garden crops like rows of corn.
- Reduced water use – As we talked about with drip irrigation, about one-third of household water use is directed towards outdoor tasks like watering the lawn, garden, and flowers. Watering using a soaker hose reduces the amount used by slowly placing water directly onto the soil, so most of it seeps into the ground instead of evaporating or running off.
- Less nutrient leaching – With a much lower amount of water moving through the soil, fewer nutrients are needlessly flushed down through the profile and out of the root zone. Less leaching equates to a reduced need for fertilizer applications and less ground or surface water contamination risk.
- Fewer plant disease problems – Many fungal problems arise when water collects and sets on the foliage for long periods, especially in high humidity. Keeping water off the leaves reduces the ability of fungal spores to settle on the leaves.
- Less soil disturbance – A soaker hose in good condition, e.g., one that doesn’t have any leaks or cracks, disturbs the soil very little when it has water running through it. Therefore, unlike overhead watering using a watering can or a sprinkler, it doesn’t wash away the soil or move seeds and seedlings.
You can see my recommendations for garden friendly soaker hoses and kits here.
I have included this article in my guide to hoses.
Components Needed to Set Up a Soaker Hose Irrigation System
Component 1 — Hoses and Connectors
How you configure your soaker hose system depends on the size and shape of your watering area.
- The most straightforward configuration runs a soaker hose directly from the faucet to your plants.
- A slightly more complex design runs a standard garden hose to your plants, where the soaker hose is attached to the end with a coupler.
- More elaborate configurations mix sections of garden hose with a soaker hose, linking them with connectors to create whatever shape you need. Using elbows and t-connectors, you can create square or rectangular layouts.
Component 2 — Connecting Soaker Hose to the Spigot
When attaching a garden hose to the faucet as the leader or directly attaching a soaker hose, you need to make sure you also have a backflow preventer and possibly a pressure regulator.
- A backflow preventer, or anti-siphon valve, lets water flow in one direction—out of the faucet—but never in reverse, preventing backflow from getting into your main water supply and contaminating drinking water.
- A pressure regulator lowers the water pressure coming out of the faucet to a level acceptable for a soaker hose. Having a pressure regulator for a soaker hose isn’t as crucial as with a drip system because you can manually adjust the water valve to open slightly, but it’s a good investment.
Controlling Your Soaker Hose
This is one area of using a soaker hose you can customize. Managing your system is either done manually or with a timer.
- Walk out and turn the hose on whenever it’s time to water. This is the cheapest option but does require you to remember to water the plants.
- Install a watering timer on the hose at the faucet. Many options, ranging in features and pricing, are available to fit your needs and budget.
Common Questions About Soaker Hose
Q. How much area will a soaker hose cover?
Depending upon your soil type, a soaker hose wets an area one to three feet wide along its length, and you can buy hoses in lengths of 25, 50, 75, or 100 feet.
Q. Will a soaker hose work with a rain barrel?
Yes, and no. A regular soaker hose works poorly with a rain barrel as the water source. But you can purchase a no-pressure soaker hose that is designed to work with rain barrels or other sources without any water pressure.
Q. Can soaker hoses be left out in the winter?
Yes, you can leave a soaker hose out all winter. When the water is shut off or the hose is disconnected from the spigot, the water will naturally seep out of the hose, preventing it from freezing and rupturing the line. However, bringing them inside for the winter increases their lifespan.
Q. Can you connect a soaker hose to a regular hose?
Yes, you can connect a soaker hose to a regular hose, and in some instances, it is recommended. Use a standard hose to run water from the faucet to the area you want to irrigate or splice regular garden hose pieces between the soaker hose if you are watering plants that aren’t close to each other.
Q. Will a soaker hose work uphill?
No, a soaker hose does not work well on sloped surfaces. It works best when on flat ground, delivering water uniformly.
Q. Can you fertilize through a soaker hose?
You can fertilize through a soaker hose, but you need to follow a specific protocol. Ensure the hose has a backflow preventer on the spigot, purchase a fertilizer injector for soaker hoses to mix the fertilizer into the water, and only use a liquid, water-soluble fertilizer.
Q. Should soaker hoses be buried under mulch?
Yes, you should bury your soaker hose under mulch. Burying the hose helps keep it in place and improves water use efficiency by improving the soil’s water retention. Putting mulch over it also helps protect it from sun damage.
Q. Can you cover the soaker hose with soil?
No, you shouldn’t cover a soaker hose with soil. The fine soil particles can clog the pores of the hose, rendering it useless.
Q. How long should I run soaker hoses for the foundation?
To keep the soil moist around the foundation, preventing the foundation from shifting or cracking, run your soaker hoses three to five times a week for fifteen or twenty minutes at a time.
Drip irrigation vs. Soaker Hose: Which One to Choose?
Now that we’ve explained the basics of each system let’s talk about when drip irrigation is good and when using a soaker hose is more suitable.
Where Do You Want Water Placed?
- Drip irrigation only releases water where you place emitters, so it works best for plants spaced further apart (bushes, pumpkins, squash, tomato plants, etc.).
- A soaker hose gives off water along its entirety, so it works best for plants grown in rows or spaced close together (carrots, beets, corn, daylilies, irises, etc.).
Do You Need Variable Water Output?
- A drip irrigation system allows you to fine-tune how much water each plant receives by using emitters with adjustable flow rates or those with different, fixed flow rates.
- All plants along a soaker hose get the same volume of water, but the water output from a soaker hose is adjustable by opening or closing the valve at the faucet to the desired flow rate.
How Intricate or Customized Do You Want Your System?
- Drip irrigation involves numerous parts and pieces that require correct assembly and regular maintenance: manifold, backflow preventer, pipes, microtubing, emitters, connectors, etc. It does allow for greater customization, though.
- In contrast, a soaker hose is more straightforward and requires significantly fewer parts. The drawback is that the system does not allow much customization beyond placement.
How Much Money Do You Want to Spend?
- A drip irrigation system has a much higher initial investment, especially if it is professionally installed.
- A soaker hose is relatively cheap, making it an excellent buy if you’re looking for something inexpensive and budget-conscious.
Does Your System Need to Be Configured Periodically?
- Drip irrigation systems are more permanent, especially if pipes are buried underground, so they aren’t easy to move or reconfigure.
- Soaker hoses are easy to reconfigure and move around, especially if you haven’t spliced them with a garden hose.
Are You Concerned About Durability?
- A well-configured and regularly maintained drip system has a lifespan of upwards of 12 to 15 years. This lifespan increases even more if supply lines and tubing are buried underground. Once set up, you will get plenty of use out of it before it needs to be replaced.
- Soaker hoses are considerably more fragile than the PVC tubing of drip systems and can crack or leak if they become crimped. Exposure to the sun causes them to deteriorate much more quickly, and even when on top of the soil surface, sediment can collect in the pores and block water seepage. You can expect two or three seasons of use out of a soaker hose.
| Drip Irrigation | Soaker Hose | |
| Pros | Highly customizable layout Can be fine-tuned to meet individual plants’ needs Very durable, lasts for a long time Works on all types of terrain |
Inexpensive to purchase Easy to set up Simple to reconfigure Very little maintenance required Doesn’t need to be winterized Provides even watering |
| Cons | Initial cost is higher May require professional installation Difficult to reconfigure Increased routine maintenance System needs to be winterized |
Water output cannot be customized to individual plants Not efficient for plants spaced further apart or not grown in rows Don’t work well on sloped ground Shorter lifespan |
Now To Wrap Things Up
As you can see, both drip irrigation and soaker hoses are great systems for improving water use efficiency, reducing nutrient leaching, and minimizing the time you need to spend in the yard watering your plants. But the distinct differences between the two systems often make one better suited for a situation versus the other.
You might want to check out other related articles on the site, here are a few to get started with: